
Articles
Adding Body to your Stout
A recent article in an advice column from one of the major US homebrewing magazines commented on how to add body to your stouts. The article provided some advice, but it missed the opportunity to comment on one of the most prevalent causes of thin body in dark beers: Improper Water Chemistry.

Beers like porter and stout include a significant proportion of dark grains to give them their color and flavor. Those grains are quite acidic and their contribution can drive mash pH quite low. While we don’t want wort pH to be greater than about 5.6 for any wort, we don’t want that pH to get too low either. One reason is that low pH enhances the performance of Proteolytic Enzymes in the mash that literally chop up the wort’s long and medium length protein chains into tiny “bodyless” remnants. Too much of that activity is the main cause of thin beer.
There are a couple of ways to avoid this low pH problem. The first is to simply have enough alkalinity in your mashing water to neutralize the extra acidity from the dark grains. Ideally, you want to keep the mashing pH for a dark beer somewhere in the 5.4 to 5.6 range to avoid excessive proteolysis and to help smooth and enrich the roasty flavors of the dark grains. Wort pH falling below 5.4 produces more acrid and sharp roast flavors that aren’t as pleasant. If your tap water has natural moderate to high alkalinity, you probably don’t need to worry about low mashing pH. But if your water has low alkalinity (like RO or distilled water), then you need to plan on adding alkalinity to the mashing water with additions such as baking soda or pickling lime. Either of those salts add the alkalinity that those waters lack.
A second method for preserving and aiding body in your dark beers is to remove the dark grains from the main portion of the mash and add them late in the mash so that they won’t have the time to chop up your wort’s valuable long and medium chain proteins and preserve their body building power. One problem with this method is that the wort pH still falls pretty low and that can leave the roast flavors more acrid and sharp. Additionally, more of those dark grains will need to be added at that late point in the mash in order to produce the same level of roasty flavors if they were added with the base grain mash in.
In a way, the second method is how Guinness produces their stout. The Dublin, St James Gate brewery gets most of its water from the Wicklow Mountains south of the city. That water actually has very little mineral content at all, and most importantly, it has very low alkalinity. Guinness mashes the pale malt and raw barley together to create the backbone of their beer. That mash is conducted in a typical pH range and is not degraded by excessive proteolysis. They separately steep the roast barley using their low alkalinity water which creates a very acidic and dark extract that they call “Guinness Flavor Extract”. They blend that extract into their regular wort to formulate the beers they want. By separating those components, they avoid the problems caused by a low mashing pH and they still produce a crisp and acidic dry stout that has high body from the raw barley’s high beta-glucan contribution. Guinness perfected a dark beer that worked with their low alkalinity water source.
So instead of boosting your grain bill or incorporating nitrogen gas dispensing as recommended in that homebrewing magazine article, the most beneficial way to enhance beer body is to make sure your mashing pH falls in the desirable range of 5.4 to 5.6. That is how to preserve body in dark beers.
Updating Water Report Info
Brewers that deal with a water supply that has varying quality, can easily update their saved water files with little effort.

You may have dozens of water files in your Bru’n Water Data Manager, but it only takes a moment to update the Water Report Input for all of those files. Here’s how:
Open Bru’n Water.
Go to the Water Report Input sheet and enter the water quality values from your new water report. Be sure and check that the new values produce a reasonably balanced Cation and Anion result. If the Cation/Anion Difference (Cell C18) is small, you should be able to rely on that new data.
Go to the Data Manager sheet and click Save. That new water file with the updated data will be placed at the bottom of your water file listing on the Data Manager sheet. Scroll down the sheet and you should see your new data in the last filled row of the Data Manager.
Select Cells G through R on that last row.
At the Bottom Right corner of that range of cells, there will be a small dot or square. Hover your mouse cursor over that dot or square and the cursor symbol should change.
Left Click the mouse on the dot or square and then Hold Down and Drag the mouse cursor directly up the page. You can drag the cursor up as many rows as you would like to modify with the updated water data. When you Release the Left Mouse Button, the updated water data from that last row will have been copied into all the rows that you highlighted while dragging the cursor up.
After you’ve copied that new water data into your saved water files, you can delete the file name (Column E) from ONLY the last row in order to allow a new water file to be saved on that Row.
Your selected water files have now been updated with the new water report data.

LibreOffice & Bru’n Water
A couple of problems have surfaced for Bru’n Water users operating under the LibreOffice platform. The first issue that can affect all users is when a Hash Incompatible warning is posted that also requires a password. This is due to a problem within the LibreOffice program. It’s relatively easy to implement a workaround.
Go to the LibreOffice Menu and select: Tools -> Options -> Load/Save -> General and then review the AutoRecovery settings. Users have two options: Either disable the AutoRecovery function or increase the time interval between the AutoRecovery saves to 60 minutes. Either revision should make it possible to perform Bru’n Water calculations without the warning being displayed.
The second problem only concerns the Supporter’s version of Bru’n Water. LibreOffice does not have the capability to run Excel’s macro language. Therefore, the Save and Reload functions for the Data Manager do not operate under LibreOffice. Bru’n Water users have to run the program under Excel in order to have that functionality.
It appears that ‘Free’ has it’s limitations.
Pre-Boiling Water Treatment
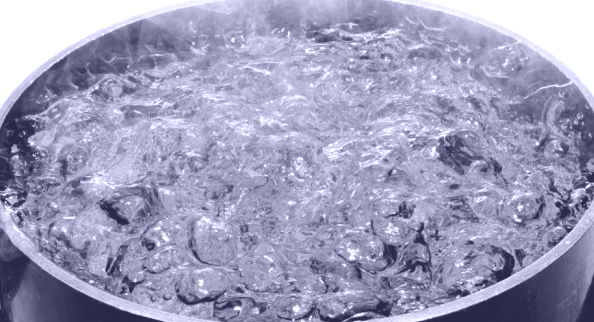
Water that has high calcium and bicarbonate content and low chloride and sulfate content, has high TEMPORARY HARDNESS. That water can be boiled and a portion of the hardness and alkalinity will drop out as chalk. So, how do you do this treatment and what might the result be?
How to do it
Pre-boiling water has been practiced by brewers for centuries. It’s easily accomplished using the equipment that a brewer already has: kettle and heat source. Here’s how to do it effectively.
The pre-boiling process works by driving off the dissolved CO2 from the water which leaves calcium and carbonate ions that precipitate as chalk. While the solubility of CO2 in boiling water is zero, it would seem that this reaction should be complete as soon as the water boils. But actual practice has shown that it takes several minutes of boiling to scrub CO2 from water. Historic brewing texts recommend 15 minutes of boiling, but it appears that 10 minutes could do.
After boiling, the water is left to cool and settle. It will take a while for the dissolved calcium and carbonate to precipitate as chalk. One technique to speed the process is to add powdered chalk to the water to serve as nucleation points. That added chalk does not dissolve into the water, so don’t worry about this counter-intuitive addition. As the chalk forms and settles to the bottom of the vessel, the water will clear. As soon as the water clears, it should be poured or siphoned off the cloudy water and sediment. Don’t let the clear water sit on the sediment too long or the chalk will eventually dissolve back into the water.
What will your water quality be after pre-boiling?Only the calcium and bicarbonate content of your water will be reduced. All other ion concentrations will remain unchanged. The practical limit for pre-boiling reduces the water’s bicarbonate content to between 60 and 80 ppm, although very good practices can reduce that to as little as 50 ppm. Therefore, the quantity of chalk that can be precipitated will be based on the difference between the starting and ending bicarbonate content. A reasonable assumption is to use an 80 ppm ending bicarbonate concentration since that allows for more error in the process. Alkalinity test kits can be used to assess the alkalinity reduction and the ending calcium content for the decarbonated water can be calculated using the following formula (all values in ppm):
The Supporter's version of Bru'n Water has this calculator incorporated.
While that equation suggests that the calcium concentration could be reduced to zero or below, the practical minimum calcium concentration achievable through pre-boiling is about 12 ppm. If the calculated calcium concentration is lower than 12 ppm when using an ending 80 ppm bicarbonate assumption, the ending bicarbonate concentration must be increased until at least 12 ppm calcium concentration is calculated. The Munich water profile is a case in point. Decarbonating that water to 80 ppm bicarbonate would leave about 7 ppm calcium in the water, which is below the practical limit. Therefore, the practical ending bicarbonate concentration must be increased to about 95 ppm to leave the treated water with 12 ppm calcium. An alkalinity test kit is a good tool for estimating what the ending alkalinity content actually is and calculating the ending calcium content.
While pre-boiling is a time and energy consuming process, its simplicity makes it a useful treatment for brewers that have high temporary hardness water.
RO Systems – When to Change Filters?
Since Reverse Osmosis (RO) systems are so handy for brewing, many brewers use them to purify their water. But those systems typically have multiple filters that require occasional replacement. When are you supposed to change them?
If you listen to the typical manufacturer or seller of these systems and filters, they recommend replacement at frequent intervals. That makes sense since the more you spend on filter replacements, the more money they make. You take it in the pocket. A smarter way is presented below.
There are three filters that are likely used in typical RO systems: Sediment, Carbon, and Membrane. They each have differing replacement intervals. Most importantly, they don’t require replacement on a Calendar basis. Here’s what you should know.
Sediment filters are robust and they have a very long life. In fact, when used with typical municipal water supplies, you shouldn’t ever have to replace a sediment filter. Those filters actually filter BETTER as they age and the typical municipal water has very low sediment and won’t clog the filter. The best way to gauge if that filter actually needs replacement is to install pressure gauges on the filter’s inlet and outlet lines. Typically, the gauges will report a pressure difference of a few psi when the RO system is operating. But if that difference increases into the 10 to 20 psi range, then it’s time to replace the sediment filter. Until then, don’t waste money on sediment filter replacement.
Carbon filters protect your RO membrane from chlorinated compounds. If you’re on a non-chlorinated well system, your system doesn’t need a carbon filter. Those on municipal water systems will need a carbon filter since the water is legally required to be disinfected. Keeping chlorine compounds away from the RO membrane extends the membrane life and keeps chlorophenols out of your beer.
To know when your carbon filter needs replacement, you’ll need to insert a SAMPLE TAP downstream of the carbon filter and test the carbon filtered water occasionally. A TOTAL chlorine (not FREE chlorine) swimming pool test kit is what is used to determine if your filter is removing ALL chlorine compounds. Inexpensive pool test kits that use an indicator chemical called OTO is what you’ll want to buy. They can measure chlorine and chloramines. The photo below shows a preferred liquid test kit. Don’t use kits with chlorine test strips since they aren’t very accurate at the low concentrations that you need to be able to discern.

Typical TOTAL Chlorine Swimming Pool Test Kit
Collect a water sample directly from your sink and perform a chlorine test on that water. You should see the water turn yellow, which indicates there is disinfectant in there (That’s a good thing). That test proves that your test kit is working. Then collect a sample from the sample tap downstream of the carbon filter. Collect the sample when the RO system is operating. The chlorine test should show NO color. No color shows that no chlorine compounds are making it through the filter. If you see any color in the test, its time to change the carbon filter. Keep a spare carbon filter on hand so that you can immediately replace the filter.
Your RO membrane does require occasional replacement. But, it is a relatively expensive unit and you’ll want to replace it as infrequently as possible. There are two reasons why RO membrane replacement may be needed: 1) the membrane is clogged and 2) the membrane is not taking enough of the dissolved salts out.
The first condition takes some investigation, but no tools. If the RO system doesn’t seem to produce RO water as quickly as it used to, then it’s possible that the membrane is clogged and needs replacement. If your raw water is really hard, then it’s more likely that clogging can occur. If it’s cold out, don’t jump to the conclusion that your membrane is clogged when it doesn’t produce RO like it usually does. Cold water does reduce the production rate for RO systems.
Checking the second condition does require a tool, but its one that all RO system owners should have: a TDS meter. They’re inexpensive and durable (Get one!) By regularly testing the Total Dissolved Solids (TDS) of your RO water, you can see if the TDS measurement is increasing beyond typical readings. If the TDS reading is climbing, it’s time to order a new membrane. There is one caution regarding TDS output from RO systems: TDS does increase slightly when the raw water temperature is higher. So, you should see lower TDS during the winter and higher during the summer.
As shown above, you don’t have to rely on a water filter seller telling you when to replace filters. Just a few enhancements to your system can put filter replacement decisions safely back into your hands.
Don’t Save Bru’n Water as .XLSX
Bru’n Water is delivered to supporters with a .DAT file name due to some email programs blocking attachments like Excel files. Users have to manually change the file extension from .DAT to .XLS However, the common modern Excel file extension is .XLSX.
The problem is that the XLSX file format will cause all of the Macros within Bru’n Water to be ERASED!
If you want to retain the ability to save and recall your brewing files in Bru’n Water, you need to only save your Bru’n Water file as either .XLS or .XLSM format.
Negative Alkalinity and Bicarbonate
A Bru’n Water user asked about negative values being reported for Alkalinity and Bicarbonate in the program.
While alkalinity is typically a positive value, it can fall below zero. The following response was taken from the United States Geological Survey:
"Alkalinity and ANC (acid neutralizing capacity) are just a measure of the deficiency of H+ ions relative to a solution of carbon dioxide in water. A negative alkalinity or ANC simply reflects the presence of some amount of mineral acidity, or an abundance of H+ ions relative to a solution of carbon dioxide in water. Alkalinity and ANC may be positive, zero, or negative. It is instructive to note that concentrations of hydroxide, carbonate, and bicarbonate ions, unlike alkalinity and ANC, cannot be negative."
Bru'n Water does tabulate the acidity or alkalinity calculated for the solution and the alkalinity value CAN be reported as a negative value in the results. In the same tabulation, the program calculates and reports alkalinity using a "Bicarbonate" surrogate. If net bicarbonate is present, it is reported as a positive bicarbonate value. If the solution has excess acidity and all bicarbonate is consumed, the bicarbonate is reported with a negative value.
Negative values are acceptable in Bru’n Water.
Bru’n Water 5.5 Enhancements
Here’s what’s new in the latest version of Bru’n Water.
Water Report Input Page
Volume settings in Gallons, Liters, Hectoliters, and Barrels, so the program is suited for homebrewers and craftbrewers, worldwide.
Provides detailed results for Cation/Anion totals and their balance.
Improved Alkalinity calculation.
Total Dissolved Solids calculation.
Water quality calculator for estimating how pre-boiling the tap water affects the water profile.
Sparging Acidification Page
Automatically imports the alkalinity value from Input page.
Dilution calculator with RO and Distilled Water options.
Two acids can be used for sparging.
Acid types and strengths are set via the drop-down box on the sheet.
Two other acids can be used on the Water Adjustment sheet to allow the use of up to four different acids in a batch.
All typical brewing acids including Lactic, Phosphoric, Citric, CRS, and others are available for use.
The amount of the acid anion added by each acid addition is also calculated and displayed.
Grain Bill Input Page
Grain color can be toggled to Lovibond or EBC.
Mashing water source can be toggled between the untreated tap water and the adjusted water to gauge the effect of treatment on mashing pH.
Acid malt strength can vary from maltster and batch. An adjustable strength setting enables users to better match acid malt usage with resulting mashing pH. The lactate ion content added to the wort from acid malt addition is calculated.
More error checking and guidance has been added to the page.
The ability to toggle Crystal or Roast malts out of main mash to check their effect on mash pH.
A percentage calculation for the grain bill.
The display is consolidated for better readability.
A Batch Name can be input for reference.
Grain color column provides a warning when color input and grain type don’t agree.
Water Adjustment Page
The page display is simplified to help users focus on important results and information.
More error checking and guidance has been added to the page.
Mash pH is displayed to eliminate switching to the Grain Bill Input for pH check.
Brewing notes for the batch can be input onto the page.
Estimate mash pH when adding minerals directly to kettle instead of mash, adding all minerals to the mash, or when replacing the calcium from pickling lime or chalk additions.
Different forms of calcium chloride can be input, including liquid solutions. A calculator for creating and using calcium chloride solutions is included.
Sodium metabisulfite addition is calculated for dissolved oxygen reduction in the mash.
All water and mineral inputs are now on this page.
As with the Sparging Water page, two acids can be used for mashing acidification. Those acids can differ from the acids used on the Sparging page. The concentration of the acid anions for each acid are also displayed.
Adjustment Summary Page
All water, mineral, and acid additions are summarized on the sheet.
Includes the Batch Name and Water Profile.
Acid anion concentrations in the finished wort are calculated. Acid anion concentrations are compared to typical taste thresholds for those anions and warning displayed when they are above the thresholds.
Reminder notes are displayed to remind the brewer when to add or reserve grains or minerals.
Data Manager Page
Save and Recall brewing sessions. Save up to 100 sessions.
Names, notes, and settings are all saved for quick reuse.
Zinc and RO Water
One of the reasons that brewers like to employ reverse osmosis (RO) water in their brewing is due to its lack of dissolved solids and nearly blank palate. However, that isn't always a good thing.
An ion that is critically important for yeast health is zinc. Typical wort provides everything yeast need for their metabolism, except zinc. In most raw water supplies, zinc is present at the trace levels needed by the yeast. But the RO process takes that trace amount and reduces it well below the level needed for yeast health and duplication. Therefore when brewing with significant percentages of RO water, it is important to supplement the water with zinc.
The preferred zinc content in brewing water is 0.2 mg/L for ale yeasts and 0.1 mg/L for lager yeasts. The difference in zinc content is likely due to the lower pitching rate for ales and its subsequent greater yeast growth. The problem with working with zinc compounds is that the need for zinc is so small and the dose at the homebrew size can be 'microscopic'. Food-grade zinc is typically available as zinc sulfate or zinc chloride. Since solid zinc chloride absorbs moisture from the air and you can't be sure how much its absorbed, zinc sulfate is an easier solid to work with. Zinc sulfate is typically available in a heptahydrate (7 water molecule) form. For zinc sulfate heptahydrate, the dose of that solid is 1 gram per 10 barrels of ale or 1 gram per 20 barrels of lager. As you can see, those doses would be exceedingly small at a typical homebrew batch size. An important factor with zinc use is that you CAN overdose your water and that can result in zinc's metallic taste coming through in your beer.
Ways to dose your water with the proper amount of zinc include: working with teeny amounts of zinc salt, diluting a known amount of zinc salt in water and figuring out how much of that solution to add, using a commercial yeast nutrient that includes zinc, or recycling spent yeast into the boil kettle. All are workable alternatives. Some require potentially tricky math and chemistry knowledge. Working with commercial yeast nutrients is easy since the provider has already figured out the nutrient dose you should use. Do make sure that the yeast nutrient that you use has zinc in it. Not all do! Recycling spent yeast is also easy, but it can impart rubbery, meaty flavor into your beer from yeast autolysis if the yeast dose is too large.
In any case, be sure to consider your water's zinc content (or lack of it) when brewing. RO users should employ some sort of zinc supplement in their water.
Post-Fermentation pH Adjustment
While Bru’n Water is a tool for managing mashing pH and mineral adjustments, there are times when post-fermentation or post-mashing pH adjustment should be performed. Better beer can be the result.
Wort or beer pH can be off through either targeting or miss-adjustment. For example, DMS removal is enhanced when wort pH is around 5.4. But that higher starting wort pH may make it harder for yeast to bring beer pH low enough.
Mashing at one pH and adjusting the pH at a later stage is OK. A common German brewing practice is to mash and boil at around 5.4 and adjust the post-boil pH down to around 5.2 with saurergut (sour wort) to help the yeast with beer acidification to produce crisper flavor presentation.
If you have a beer with flavor or perception that is a little dull or flabby, dosing the beer with an acid can make a significant difference. While a universal acid dose can’t be prescribed, you can conduct taste tests in a glass of the beer to find a dose that pleases you without being too acidic. A dropper or pipette is recommended to enable you to measure your dose. Use a glass large enough so that a single drop of your acid won’t instantly put the beer over the limit. Give the beer a good stir and taste. Once you’ve found a pleasing dose, scale that up and add to the kegged beer.
Similar taste testing can be performed when dealing with a dark and roasty beer that has an overly sharp or harsh bite to it. It may be possible to take the edge off that beer by raising its pH with either lime or baking soda. Again, measure out a small amount of either mineral (say 0.1 gram in a pint of beer) and stir it in and taste the beer. If the taste improves, try similar doses to see if it further improves the beer. Scale it up and dose your kegged beer if you find a pleasing dose.
Note that these recommendations don’t require the use of a pH meter, but measuring beer pH before and after adjustment is a good idea. There is no guarantee that pH adjustment will correct a disappointing beer, but consider this a tool for tuning your beers to your preference!